Cake pop mania is going strong! Cute cake on a stick. Yes, please. Made popular by baking genius Bakerella, cake pops are now everywhere, from every food blog (I dare you to find one without a cake pop post) to Starbucks.
When cake pops look so pretty, who can resist? Especially when making them is such simple business. I can’t promise you’ll be able to replicate the Mona Lisa on a bite they way Bakerella surely can, but hopefully these tips can get you started.
1. Start with cake
Any sheet cake will do. Pick one from your favorite recipes (mine: yellow cake, chocolate cake, red velvet cake and spiced zucchini cake) and bake it in one big ‘ol sheet pan or two rounds–whatever the directions say. If you don’t want to make a cake from scratch, try an all-natural box mix. I did that very thing and they were super tasty.
2. Grab a fork
Once your cake has cooled, use a fork to crumble the whole thing into a bowl. How easy is that?
3. Mix with frosting
Use your hands to mix the crumbled cake with frosting. You’ll need about 16 ounces (or one can if you’re buying it) of frosting for every standard layer cake, which is about one box of cake mix; two 9×9″ cakes. Or wing it! You want a mixture that’s a gooey brownie consistency, something that’ll hold together when rolled.
4. Get rolling
Roll the cake mixture into balls about the size of a quarter. Don’t want to mess up your fresh mani? Try this cake pop mold for just $5.95. Then chill the cake balls in the fridge for a couple of hours or in the freezer for 30 minutes.
5. Think toppings
Right before the cake balls are done chilling, melt candy melts on the stove or in the microwave–this is the chocolate candy coating on cake pops.
6. Grab a stick
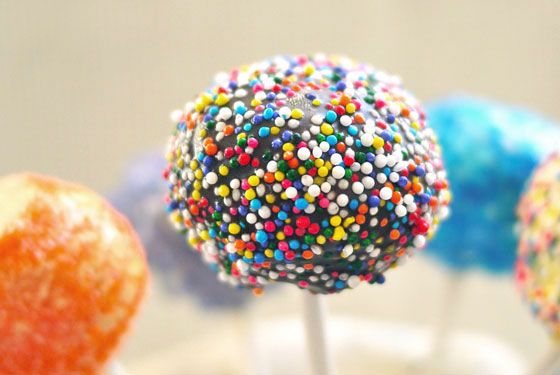
Dip a lollipop stick in the melted candy coating before sticking it 2/3 of the way into a cake ball and then dip the whole cake pop into the coating. Voila, your pop art canvas! Decorate as you wish…but don’t stress. Here, simple is good. And just as delicious.
7. Let them dry
Bakerella suggests that you stick the finished cake pops into a piece of styrofoam to dry. While this is a perfect solution for you crafty mamas who have styrofoam blocks lying around the house, the rest of us can use a colander to dry cake pops — a genius tip I found from Quinn’s Baking Diary.
Done and done. Long live cake pops for all!
If you need a how-to with pics, this cake pop tutorial by Elsie at A Beautiful Mess has a photo for every step, perfect for us visual learners.
[photos via A Beautiful Mess & One Hungry Mama]


Those are so cute! I bet kids absolutely love them!
I just tried making your cake pops, after I dipped them in the candy coating ,when it hardened it cracked. What am I doing wrong
Cathryn: There are several possibilities. One is you just didn’t put a thick enough coat on the cake pop. To make it thick, dip in chocolate, bring the pops up and let them drip and begin to harden for a few seconds, and dip again. Repeat a few times to get a nice, thick candy coating.
Did you add shortening or veg oil to thin your melted candy coating? If you did, another possibility is that you added too much. The coating should be thick enough to coat a spoon but still slowly drip off.
Another possibility is that the cake balls were too cold when you dipped them into warm, freshly melted candy coating. The cold can make warm coating crack as it tries to harden. Get them just cold enough to be solid, then let them sit on the counter for a minute or two before dipping. You can also let the melted coating come down in temp a little bit to bring the two ingredients closer in temp.
Hope this helps!
I would love to make cake pops, but my draw back is I can’t stand the taste of candy melts. Is there a way to spruce up the taste or a different alternative to make cake pops?
Nicole, I’ve had some luck using melted milk chocolate chips or white chocolate chips—it may be too thick so you may need to use shortening to thin it a bit.
Another idea is to make a powdered sugar/water icing or a donut-like glaze and dip it in that before rolling in sprinkles or colored sugars.
I have also used melted chocolate + shortening and even melted chocolate + coconut oil (the same way that you would for homemade magic shell). One other thing to throw into the mix: not all candy melts are created equally. One of the most popular brands happens to be one of my least favorite tasting. If you’re up to it, you may want to try other brands.