I love gifts and artwork that have personal touches – if it has a monogram, sign me up. Our new house has so many blank walls just waiting to be filled, and one piece of personalized art that I knew I wanted to make for it was a framed silhouette portrait of my toddler. Once the realm of skilled paper cutters, if you have a computer and a printer, and you’ve always wondered how to DIY, I’ve got an easy shortcut for you so you can make your own silhouette portrait.
Have an older child? Get her in on the action too and have her help trace and cut. The great thing about this is that if you make a mistake, you can always reprint.
Materials for Making A Silhouette Portrait
Enlarged photo of your child’s profile
Printer
Pencil
Black scrapbook paper (I like the weight)
Scissors or X-Acto Knife
Glue stick
8×10 Frame (Or size of your choice)
How to Make A Silhouette Portrait: New School Computer Style

1. Take a great (or find an existing) profile photo of your child, ideally one a clean background. Then, enlarge it or shrink it to the size you’d like. I enlarged mine to 7×9 so it would fit in an 8×10 frame. Print out the photograph.
Note: You don’t have to use Photoshop! Preview can be an easy tool to work with, or Cool Mom Tech always recommends PicMonkey for basic edits.
2. Print out the photograph on regular paper, then using scissors or your X-Acto blade, carefully cut out the profile of your child.

3. Lay the cut-out photo on a black piece of paper that’s large enough for the photo you’ve chosen. Trace around the photo with a pencil. Cut the silhouette out with scissors (yes, a second time) just inside the pencil line, and go slow! Trust me on this one.

4. Using a glue stick, adhere the silhouette to a white piece of paper or the backing of the frame. If using paper, of course you want to make sure it fits the size of your frame. (But hey, if not, you already have scissors there, right?)

5. I like to make sure the cut part of the bottom of the silhouette “bleeds” off the bottom of the frame, so you don’t end up with that strange cut-off neck that you sometimes see.
Close up the frame, and you have a great piece of artwork for your own home–or a perfect gift for Grandma and Grandpa.
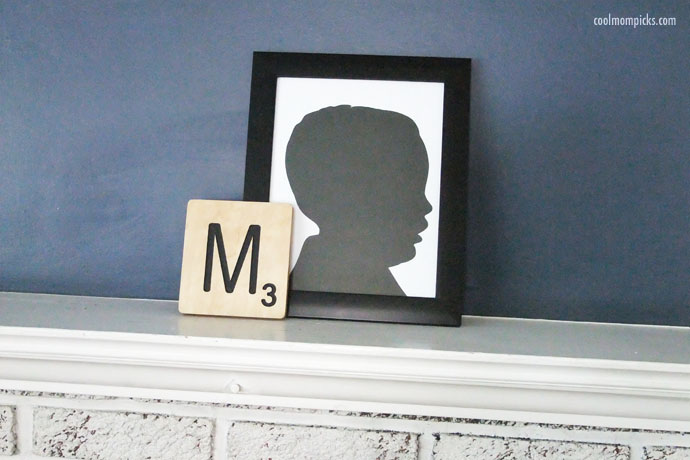
Beautiful, right?
Pro Tips for Making the Best Silhouette Portraits
-Cut out and trace as much detail as you can around the photo. The more detail in the hair, face, even hair bands or bows., the better the silhouette.
-When cutting out the finished project, stay just slightly inside the pencil lines so you don’t have them showing up on your artwork. Plus it will keep the proportions even all the way around the shape.
-Using a glue stick ensures a smooth finish. I find using Elmer’s or craft glue can get you bumps, which you don’t want. Obviously.
-As with all glue projects, make sure that you get the placement right where you want it before you press the silhouette down. If you glue it and then have to pull it up, the paper may tear and you’ll have to start over. But I’m sending good karma that that will never happen.
Check out the Cool Mom Picks Printables + DIY Pinterest board for lots more DIY decorating ideas.