Our favorite crafts around here are simple ones that don’t require an MFA, and it’s a big bonus when we don’t even have to head to the craft store for supplies. And if these crafts help us have conversations about the world around us, allow our kids to get in touch with nature or our community, or teach them the importance of gratitude, then even better.
This cute DIY thankful turkey craft is a very easy and fun craft that fits all these categories. I’ll be making these with my kids this year while we wait for our turkey to cook, because we really do have a lot to be thankful for. And taking a minute to reflect on this — and maybe even getting inspired to help others have the same opportunities we have — is a great way to spend our Thanksgiving morning. (Way better than watching football on TV, if you ask me.)
But you can make these thankful turkeys anytime this month — they turn out so nice you’ll want them on full display the entire season.
")
Related: 8 fun and easy Thanksgiving crafts for kids beyond tracing a hand to look like a turkey.

The supplies
– construction paper
– scissors
– markers
– glue
– cereal bowl and pint glass
– pen

Step 1: Cut out the pieces
If you’re making your thankful turkeys with small children, I’d recommend cutting out the pieces ahead of time so they can get straight to the fun part. But if your kids are elementary school-age or older, they can definitely do this step on their own.
On a sheet of brown construction paper, set a cereal bowl upside down and trace it for the large circle that will make the body of the turkey. Use the bottom end of a pint glass to trace another circle that will be its face. Then, trim the corner off a piece of yellow construction paper to make the turkey’s beak.
The most complicated part is getting the turkey’s waddle right. To make a guide for cutting this piece, draw a large number 8 on a piece of red construction paper. Cut around the outside of the 8, making sure to leave plenty of room at the center where the lines cross.
To top off the look, you could even make a little pilgrim hat from black and white construction paper (if you’re feeling extra ambitious).
Finally, draw an outline for the feathers on a piece of construction paper freehand. To speed things up, I stacked 4–5 pieces of different colored paper and cut them all at once. If your kids are doing the cutting, though, I’d recommend they cut through just one piece of paper at a time.


Step 2: Assemble the turkey’s body
To assemble the pieces so that they actually look like a turkey, add a dab of glue to the top edge of the large circle and paste the smaller circle there. Glue on the yellow triangle to the center of the smaller circle, and tuck the red figure 8 under the edge of the triangle. You could use googly eyes for the turkey’s face if you have them on hand, but two black dots from a marker make pretty cute eyes too. Easy!
Related: 10 easy Thanksgiving crafts for kids that also make great table decor

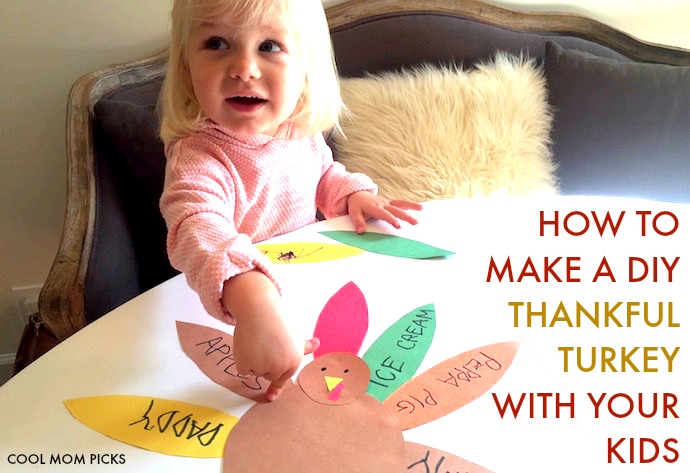
Step 3: Write on the feathers
Pass out the feathers and a black marker to your kids, and have them write down things they’re thankful for. This can be anything from family to ice cream to Peppa Pig. We don’t judge! If they’re thankful for it, it goes on a feather.
This is where you can really give the kids a lot of time to work and think. For older kids who can be trusted with scissors, they can cut some texture along the sides of their feathers to make them more interesting and real. Little kids who can’t yet spell can draw pictures of what they’re thankful for, or you can help write down what the kids dictate.
Challenge them to think of at least 10 things to include.
BTDT tip: Unless you don’t mind reading some of the words upside down, lay out the feathers around the turkey first and mark with a small dot where your kids should start writing their word. And be sure they leave a little space on the end of each feather that will tuck behind the turkey’s body.

Step 4: Glue the feathers to the back of the turkey
Add a dab of glue at the end of each feather and stick it to the back of the turkey’s body. You’ll end up with an adorable turkey full of thankfulness — a great conversation starter around the dinner table while you feast.
My thankful feather #1: Easy Thanksgiving crafts my kids will love.
All photos (c) Kate Etue for Cool Mom Picks